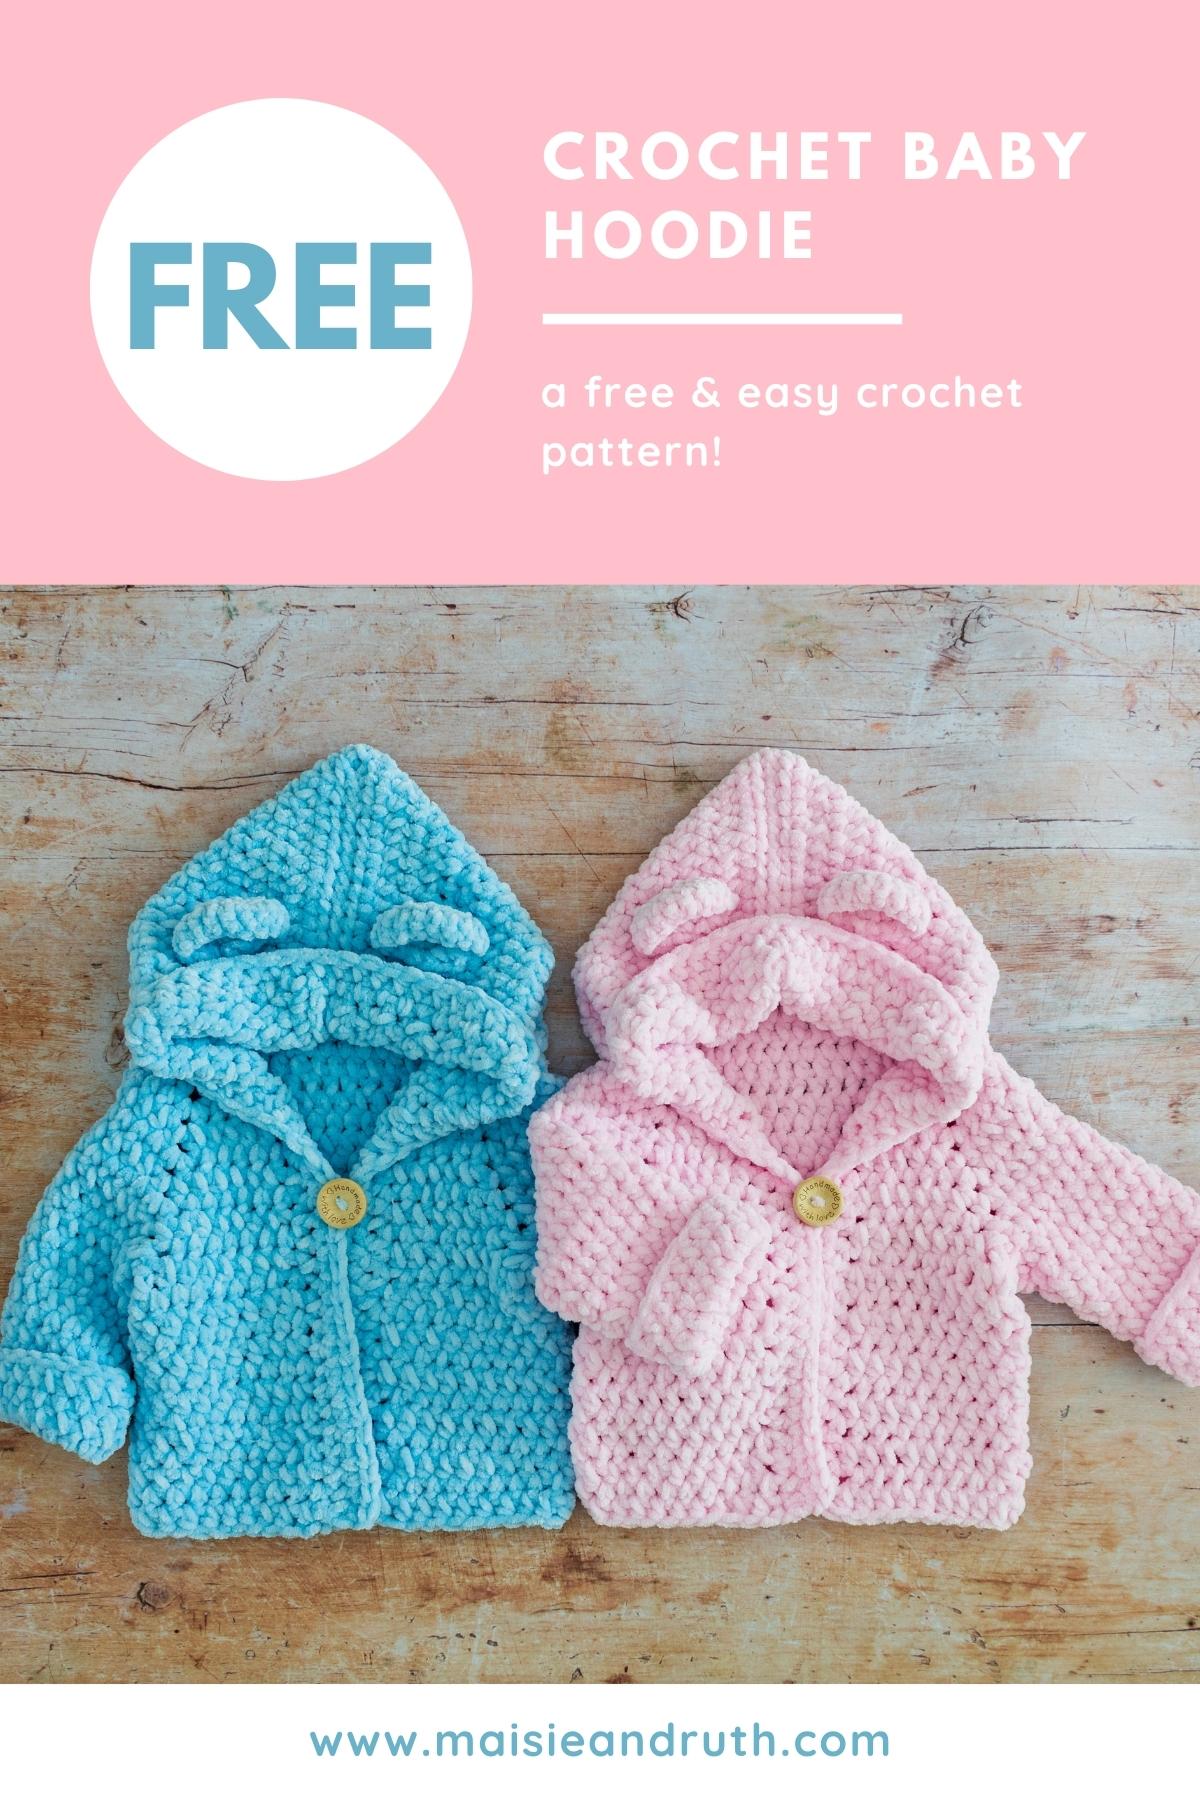
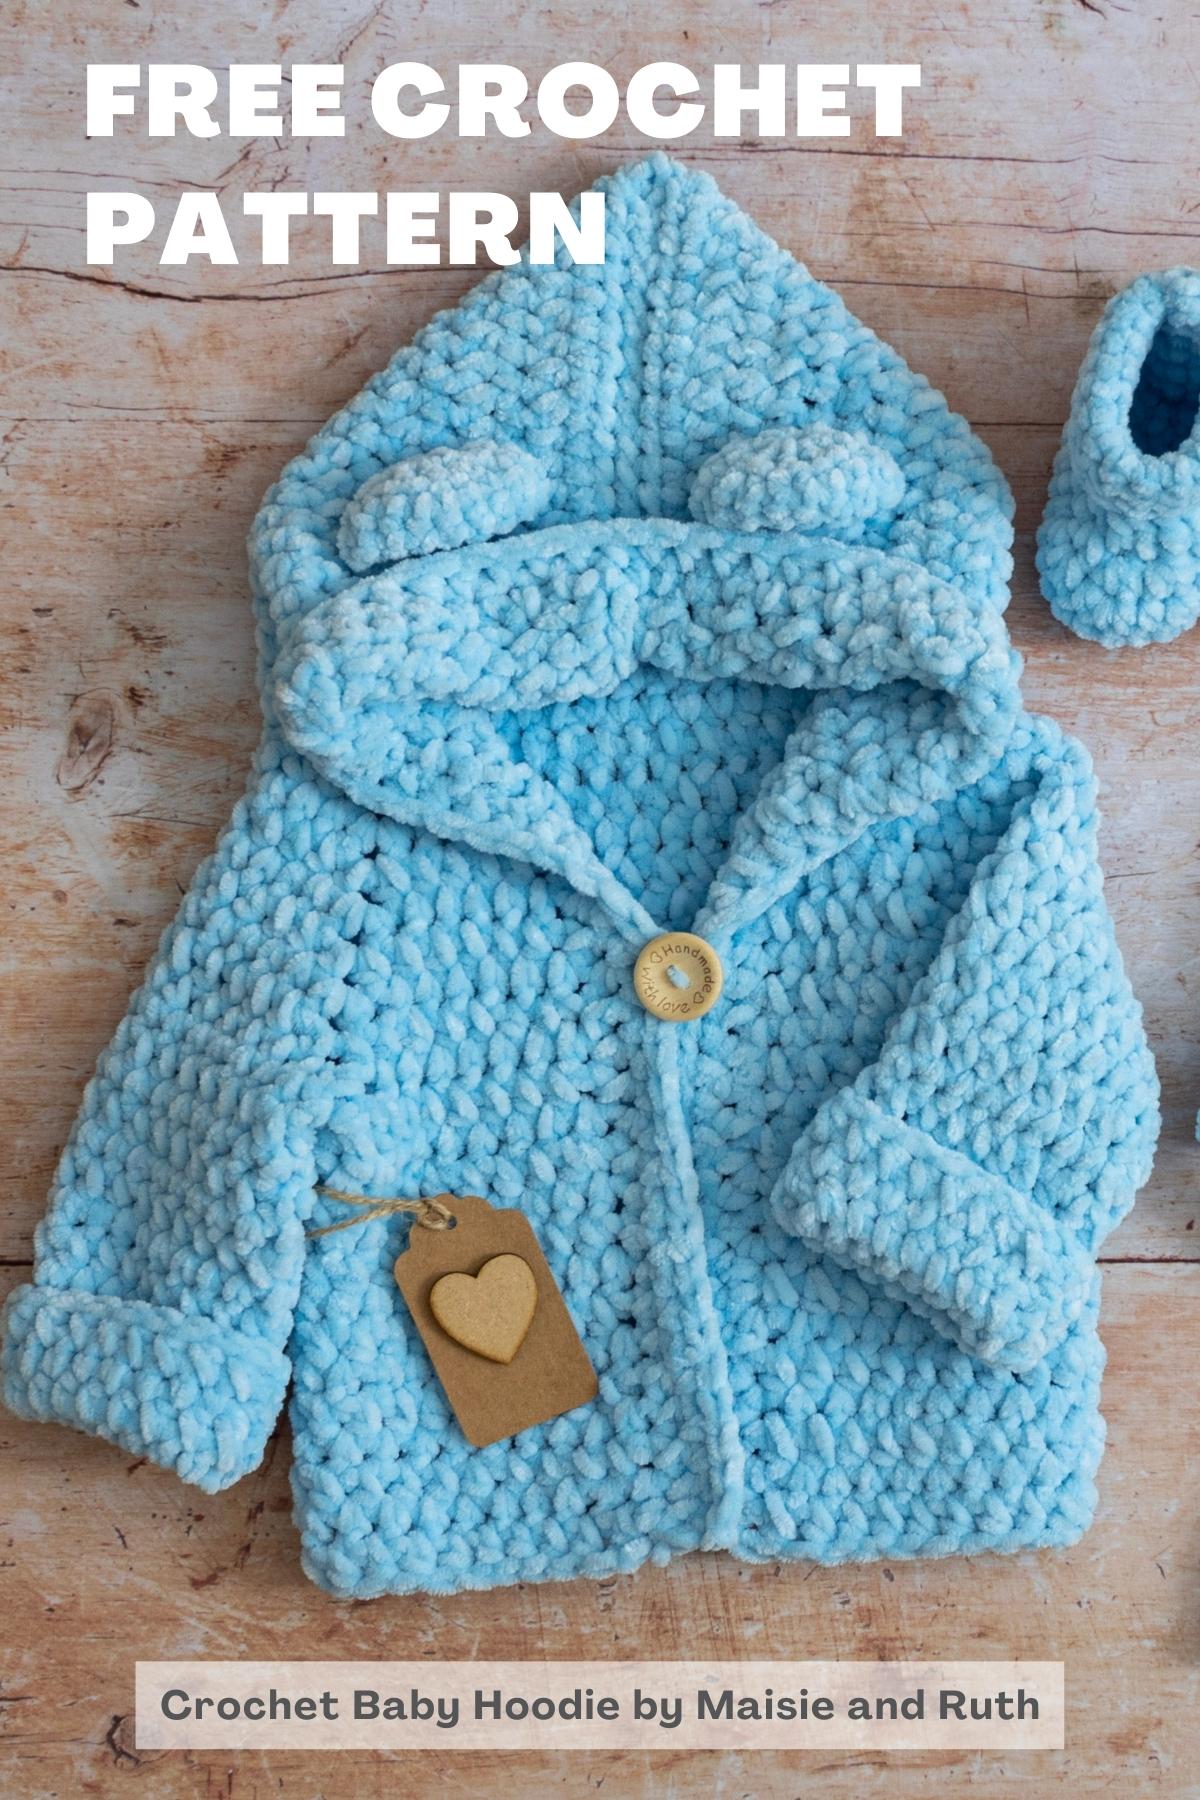
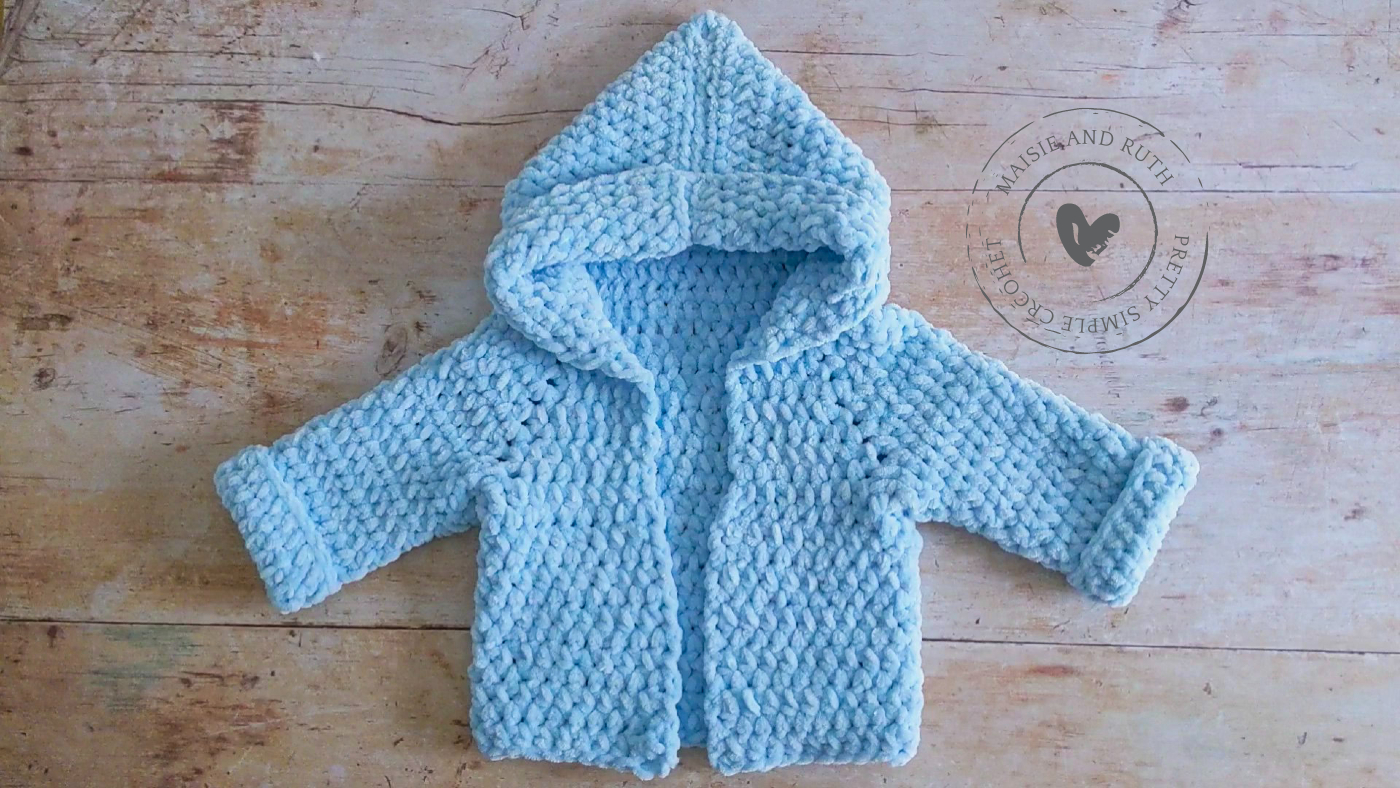
Free Quick and Easy Crochet Hooded Baby Sweater Pattern
Keep baby cosy and warm in this adorable little crochet baby hoodie!
The FREE written pattern also comes with a video tutorial… just scroll down to view it.

This post for a crochet baby hoodie pattern may contain affiliate links, which means I'll receive a commission if you purchase through my links, at no extra cost to you. Please read full disclosure for more information.
QUICK & EASY PROJECT
This crochet baby hoodie works up really fast as you'll be using a chunky / bulky / 12 ply yarn.
I used James C.Brett Flutterby Chunky, which is a 100% polyester chenille yarn.
The yarn is advertised as being super soft and I can confirm that it's definitely one of the softest yarns I've ever worked with!
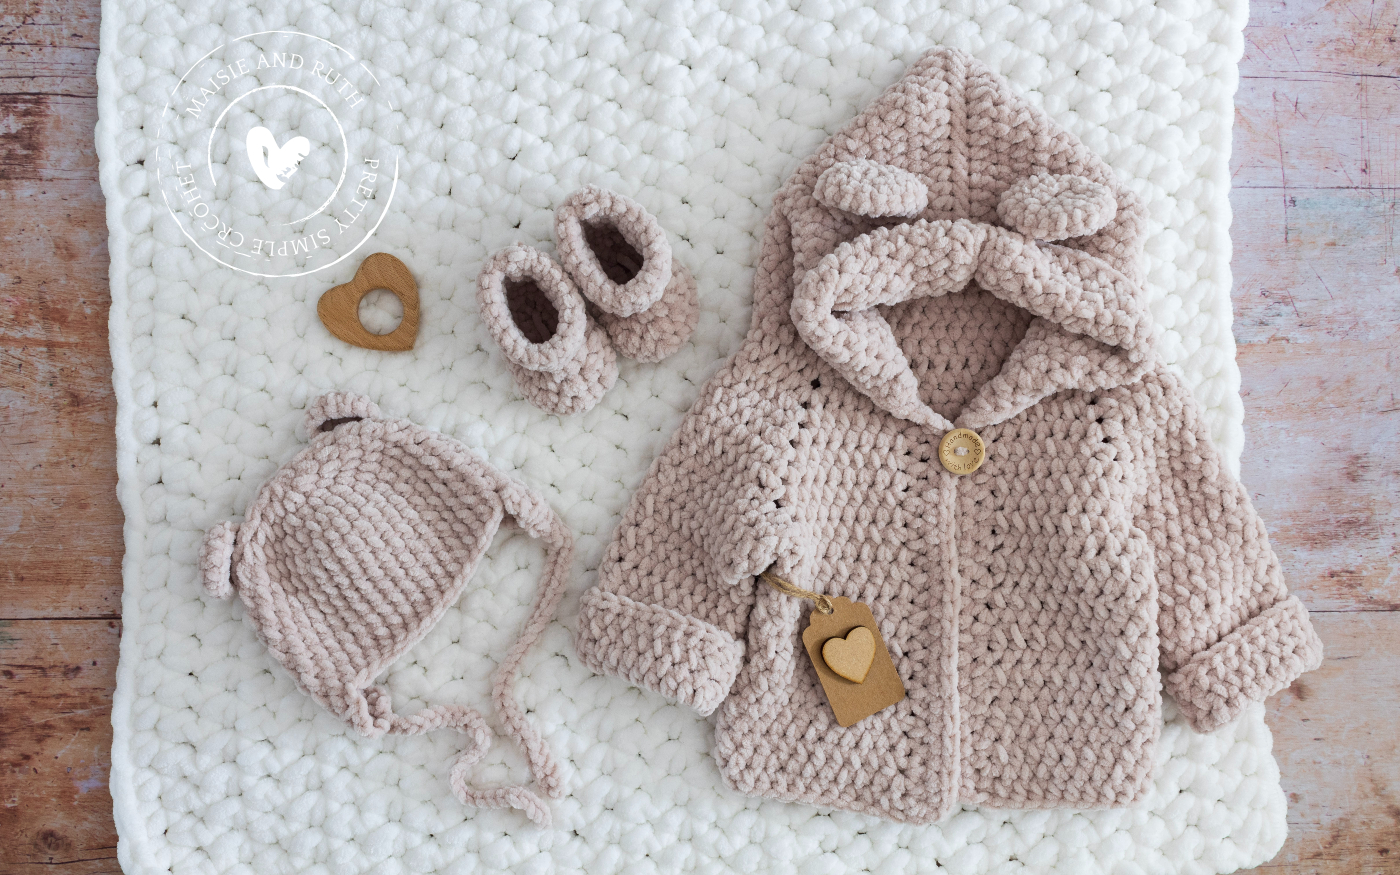
So much so that I designed matching baby booties and a little bear hat.
There's also a baby blanket to go with the set (made with a super chunky yarn).
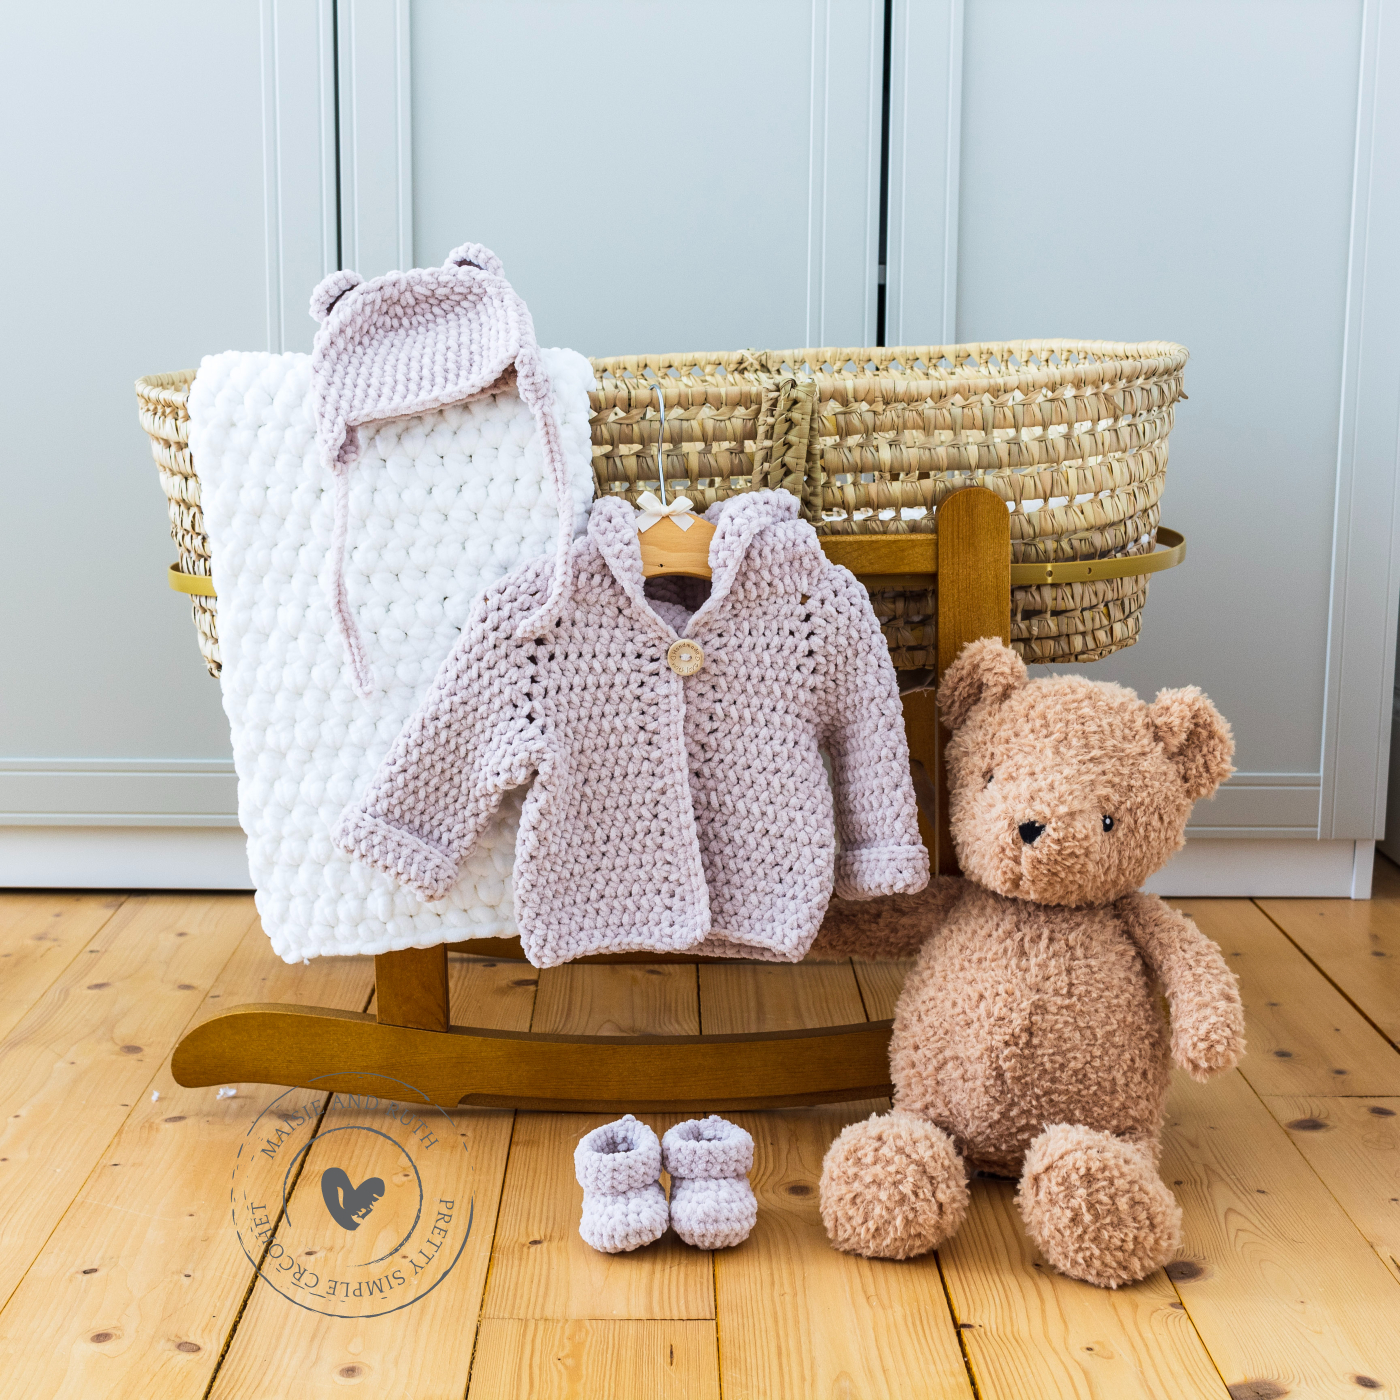
The crochet baby hoodie is part of a set consisting of a hat, booties and baby blanket.
SIMPLE DESIGN
This cute baby hoodie is a top-down design, so you'll begin working from the neck edge downwards.
Basic stitches are used to make the hoodie, namely the half double crochet stitch.
It's important to note that instead of crocheting through the top of each stitch, you'll work your stitches in the spaces in between each stitch. This creates a very attractive and unique texture.
To finish your little hoodie, you can add a couple of bear ears (an optional feature but I think they do add an extra touch of sweetness!).
Ready? Let's learn how to make this cute crochet baby hoodie!
VIDEO TUTORIAL
You can view the video for this crochet baby hoodie below.
There are two parts to the tutorial. You can view Part 2 on my YouTube channel.

PIN IT FOR LATER!
Follow me on Pinterest!
CROCHET BABY HOODIE: A FREE PATTERN
This post for a crochet baby hoodie pattern may contain affiliate links, which means I'll receive a commission if you purchase through my links, at no extra cost to you. Please read full disclosure for more information.
Please carefully read all the information below.
LEVEL
Easy – (see details of project levels at the Craft Yarn Council).
SUPPLIES
- Yarn: Category #5 / chunky / bulky / 12 ply yarn. I used James C. Brett Flutterby Chunky, 191 yds / 3.5 oz (175m / 100g). For size newborn & 0-3 months: 2 balls. For size 3-6 months : 3 balls. For the blue hoodie I used colour 3; for the pink one colour 2 was selected; for the beige hoodie I used colour 28 (oatmeal).
- Crochet hooks: J (6mm) & K (6.5mm) (these hooks are great for this type of yarn).
- Yarn needle (the bent tip makes sewing and weaving in ends much easier).
- Scissors (super sharp… and pretty).
- Stitch marker (these interlocking markers will not escape from your work!).
- 1 button: 1 inch (25mm) (this box contains 150 super cute wooden buttons in 3 sizes)
GAUGE / TENSION
In order to achieve the correct size and fit , it is important to test your gauge with a sample square before you begin.
If your tension is tight (too many stitches to 4″), try using a larger hook.
If your tension is loose (fewer stitches to 4″), use a smaller hook.
With a J (6mm) hook: 12 stitches & 10 rows = 4″ (10cm) in half double crochet worked in the spaces in between each stitch.
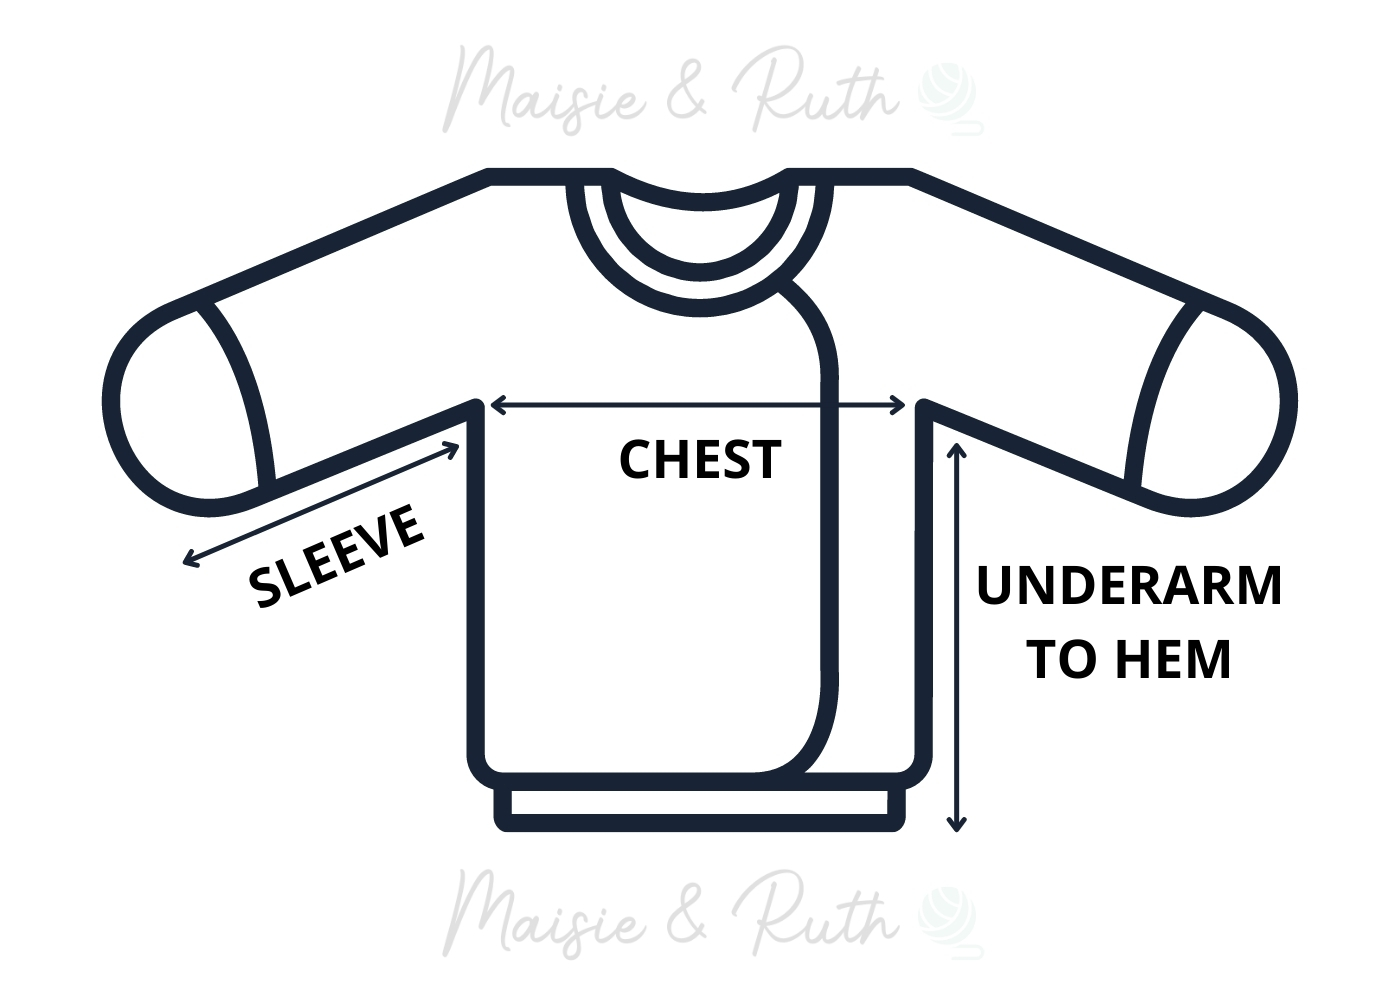
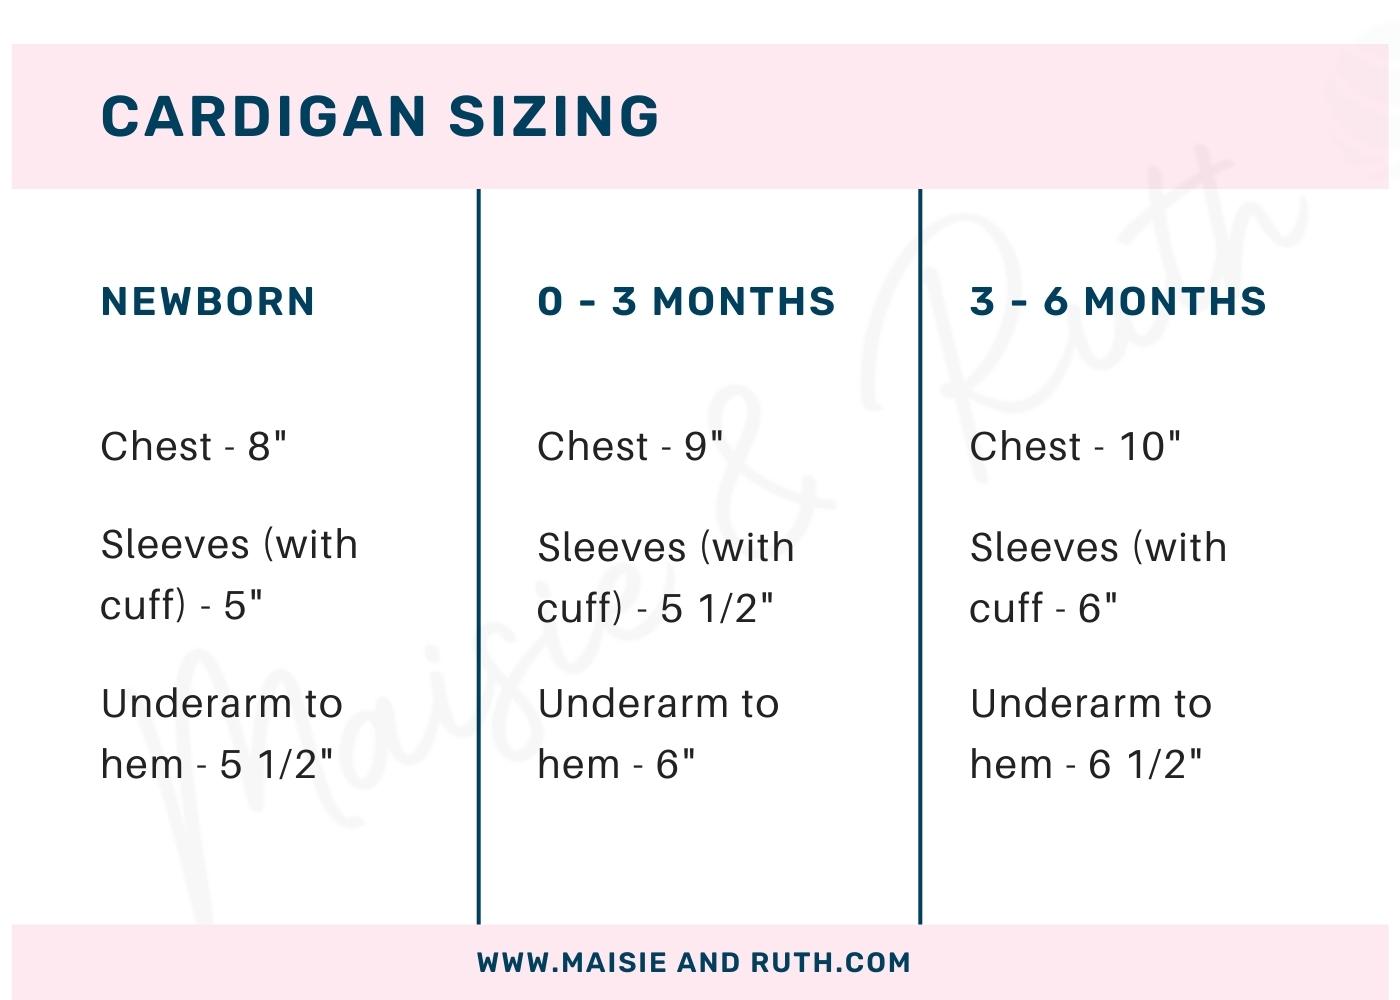
FINISHED SIZE
Three sizes are available: Newborn , 0-3 Months and 3-6 months .
The sizes given are based on the standard measurements from the Craft Yarn Council. The cardigan has been designed with some positive ease, which means that it will quite comfortably fit over clothing. And knowing how quickly babies tend to develop, it will leave enough room for baby to grow into also!
STITCHES & ABBREVIATIONS (US CROCHET TERMS)
beg – beginning
ch(s) – chain(s)
fasten off – To fasten off securely, work one chain, then cut the yarn leaving a 5 – 6" tail. Pull the tail through the loop that is on your hook. Tighten gently.
hdc – half double crochet: Yarn over (yo), insert hook into next space, yo, pull up a loop (3 loops on hook). Yo, pull through all 3 loops. 1 half double crochet completed.
hdc2tog – half double crochet two together (also known as a hdc decrease): Yarn over (yo), insert hook into next space, yo, pull up a loop (3 loops on hook). Yo, insert hook into next space, yo, pull up a loop (5 loops on hook). Yo, pull through all 5 loops. Hdc2tog completed.
RS – right side: The side of your work that you want to have on display – the 'pretty' side.
sc – single crochet: Insert hook into stitch, yarn over (yo), pull up a loop (2 loops on hook). Yo, pull through both loops on hook. 1 single crochet completed.
sk – skip: Do not crochet into this stitch / space.
sl st – slip stitch: Insert hook into stitch, yarn over (yo), pull up a loop, you will have 2 loops on your hook. Pull the first loop through the second loop. 1 slip stitch completed.
sp(s) – space(es)
st(s) – stitch(es)
V-st – (1hdc, ch2, 1hdc) into the same space
Turn: Turn your work clockwise or anti-clockwise. It doesn't matter as long as you are consistent for a neater edge.
WS – wrong side: The back / inside of your crochet piece.
( ) – Sets of stitches to be worked as many times as directed or sets of stitches to be worked within one stitch or space.
[ ] – The total number of stitches at the end of a row.
PATTERN NOTES
- US crochet terms used.
- Instructions are for size newborn . Changes for size 0-3 months and 3-6 months are given inside round () brackets.
- When only one instruction is given in black, it applies to all sizes.
- Cardigan is worked in one piece from neck edge down.
- For best results, use the recommended yarn. You can use any other #5 / bulky / chunky / 12 ply yarn for this project, providing you meet the gauge as detailed above.
- From row 2 of the yoke onwards, you'll work your half double crochets in the spaces in between each stitch (as opposed to crocheting through the top of each stitch).
- When working the yoke, main body and hood sections, the ch2 turning chain does not count as the first stitch of the next row. Therefore, you should make the first half double crochet of the row in the first space, at the base of the ch2.
- When working the sleeves, the ch2 turning chain counts as the first stitch of the next round. Therefore, you should make the first half double crochet of the round in the next space.
- A video tutorial is provided with this pattern (newborn size only – see above). There are two parts: Part 1 covers the yoke and main body of the hoodie; part 2 covers the sleeves, hood, edging and ears.
INSTRUCTIONS
YOKE
Starting with a J (6mm) crochet hook:
Chain 37 ( 42 – 47 )
Row 1. 1hdc in 3rd ch from hook, 1hdc in next 2 ( 3 – 4 ) ch, V-st in next ch (see abbreviations above), 1hdc in next 7 ( 8 – 9 ) ch, V-st in next ch, 1hdc in next 10 ( 11 – 12 ) ch, V-st in next ch, 1hdc in next 7 ( 8 – 9 ) ch, V-st in next ch, 1hdc in next 4 ( 5 – 6 ) ch, TURN [ch2, 39 ( 44 – 49 ) hdc, 4x ch2 sps].
Starting from row 2, and throughout the remainder of the pattern, you'll work your half double crochets in the spaces in between each stitch.
Row 2. Ch2, 1hdc in first sp (at base of ch2), 1hdc in next 3 ( 4 – 5 ) sps, V-st in next ch2 sp, 1hdc in next 8 ( 9 – 10 ) spaces, V-st in next ch2 sp, 1hdc in next 11 ( 12 – 13 ) sps, V-st in next ch2 sp, 1hdc in next 8 ( 9 – 10 ) sps, V-st in next ch2 sp, 1hdc in next 3( 4 – 5 ) sps, 1hdc in sp between last st and beg ch2, TURN [ch2, 43 ( 48 – 53 ) hdc, 4x ch2 sps].
Row 3. Ch2, 1hdc in first sp, 1hdc in next 3 ( 4 – 5 ) sps, V-st in next ch2 sp, 1hdc in next 9 ( 10 – 11 ) sps, V-st in next ch2 sp, 1hdc in next 12 ( 13 – 14 ) sps, V-st in next ch2 sp, 1hdc in next 9 ( 10 – 11 ) sps, V-st in next ch2 sp, 1hdc in next 4 ( 5 – 6 ) sps, 1hdc in sp between last st and beg ch2, TURN [ch2, 47 ( 52 – 57 ) hdc, 4x ch2 sps].
Row 4. Ch2, 1hdc in first sp, 1hdc in next 4 ( 5 – 6 ) sps, V-st in next ch2 sp, 1hdc in next 10 ( 11 – 12 ) sps, V-st in next ch2 sp, 1hdc in next 13 ( 14 – 15 ) sps, V-st in next ch2 sp, 1hdc in next 10 ( 11 – 12 ) sps, V-st in next ch2 sp, 1hdc in next 4 ( 5 – 6 ) sps, 1hdc in sp between last st and beg ch2, TURN [ch2, 51 ( 56 – 61 ) hdc, 4x ch2 sps].
Row 5. Ch2, 1hdc in first sp, 1hdc in next 4 ( 5 – 6 ) sps, V-st in next ch2 sp, 1hdc in next 11 ( 12 – 13 ) sps, V-st in next ch2 sp, 1hdc in next 14 ( 15 – 16 ) sps, V-st in next ch2 sp, 1hdc in next 11 ( 12 – 13 ) sps, V-st in next ch2 sp, 1hdc in next 5 ( 6 – 7 ) sps, 1hdc in sp between last st and beg ch2, TURN [ch2, 55 ( 60 – 65 ) hdc, 4x ch2 sps].
Row 6. Ch2, 1hdc in first st, 1hdc in next 5( 6 – 7 ) sps, V-st in next ch2 sp, 1hdc in next 12 ( 13 – 14 ) sps, V-st in next ch2 sp, 1hdc in next 15 ( 16 – 17 ) sps, V-st in next ch2 sp, 1hdc in next 12 ( 13 – 14 ) sps, V-st in next ch2 sp, 1hdc in next 5 ( 6 – 7 ) sps, 1hdc in sp between last st and beg ch2, TURN [ch2, 59 ( 64 – 69 ) hdc, 4x ch2 sps].
Row 7. Ch2, 1hdc in first sp, 1hdc in next 5 ( 6 – 7 ) sps, V-st in next ch2 sp, 1hdc in next 13 ( 14 – 15 ) sps, V-st in next ch2 sp, 1hdc in next 16 ( 17 – 18 ) sps, V-st in next ch2 sp, 1hdc in next 13 ( 14 – 15 ) sps, V-st in next ch2 sp, 1hdc in next6 ( 7 – 8 ) sps, 1hdc in sp between last st and beg ch2, TURN [ch2, 63 ( 68 – 73 ) hdc, 4x ch2 sps].
For size 3-6 months only:
Next Row. Ch2, 1hdc in first sp, 1hdc in next 8 sps, V-st in next ch2 sp, 1hdc in next 16 sps, V-st in next ch2 sp, 1hdc in next 19 sps, V-st in next ch2 sp, 1hdc in next 16 sps, V-st in next ch2 sp, 1hdc in next8 sps, 1hdc in sp between last st and beg ch2, TURN [ch2, 77 hdc, 4x ch2 sps].
Before moving on to the next section, the length from the neck edge should measure as follows:
Newborn and 0-3 months : 3.25″ (8cm)
3-6 months : 3.5″ (9cm)
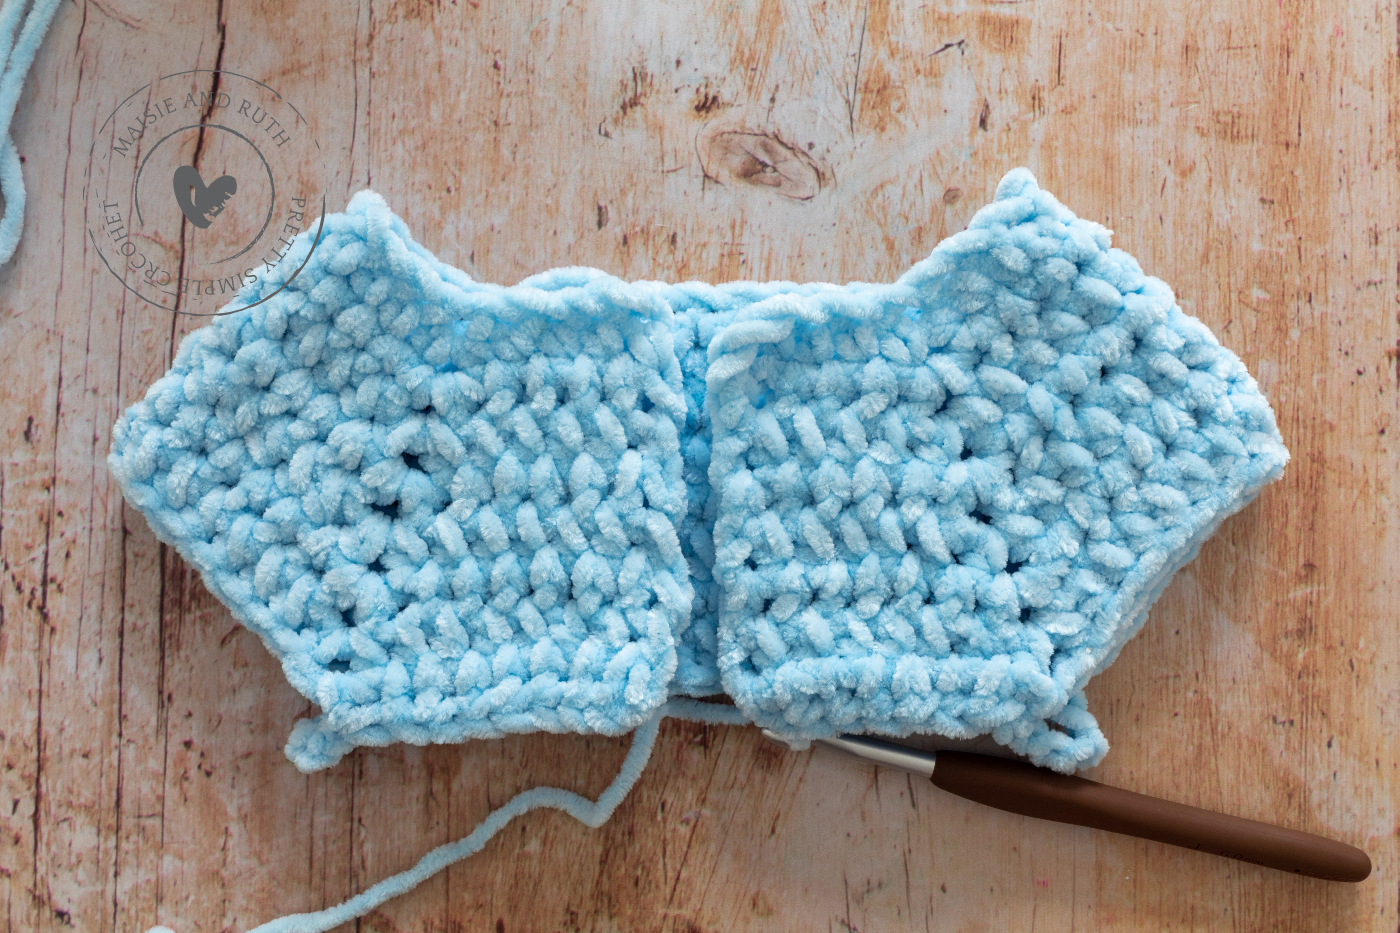
DIVIDE FOR ARMHOLES
You will create two armholes in the next row.
Next Row. Ch2, 1hdc in first sp, 1hdc in next 6 ( 7 – 8 ) sps, (1hdc, ch5) in next ch2 sp, sk next 15 ( 16 – 18 ) sts, 1hdc in next ch2 sp, 1hdc in next 17 ( 18 – 20 ) sps, (1hdc, ch5) in next ch2 sp, sk next 15 ( 16 – 18 ) sts, 1hdc in next ch2 sp, 1hdc in next 6 ( 7 – 9 ) sps, 1hdc in sp between last st and beg ch2, TURN [ch2, 35 ( 38 – 43 ) hdc, 2x ch5 sps].
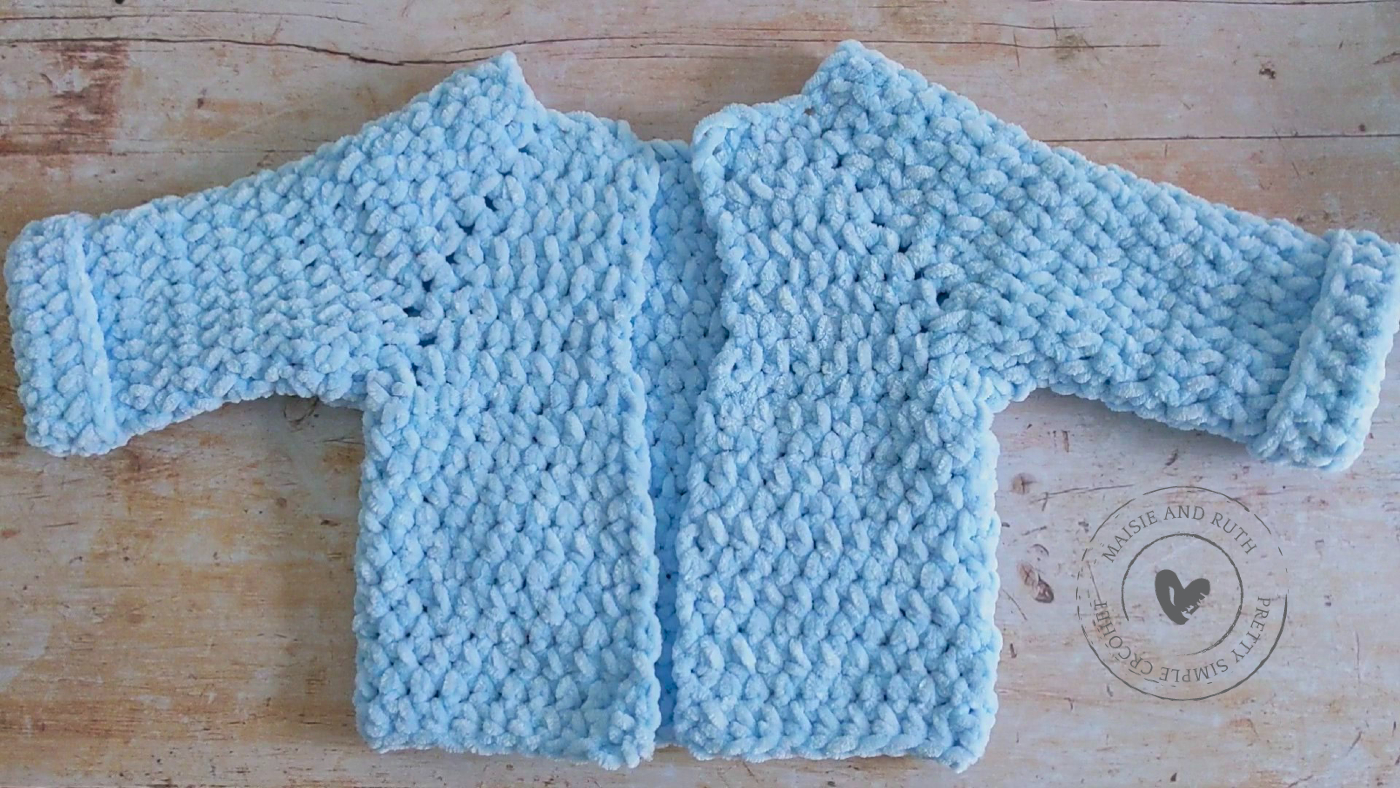
As you can see from the image below, you've divided your hoodie for the sleeves and have created two armholes:
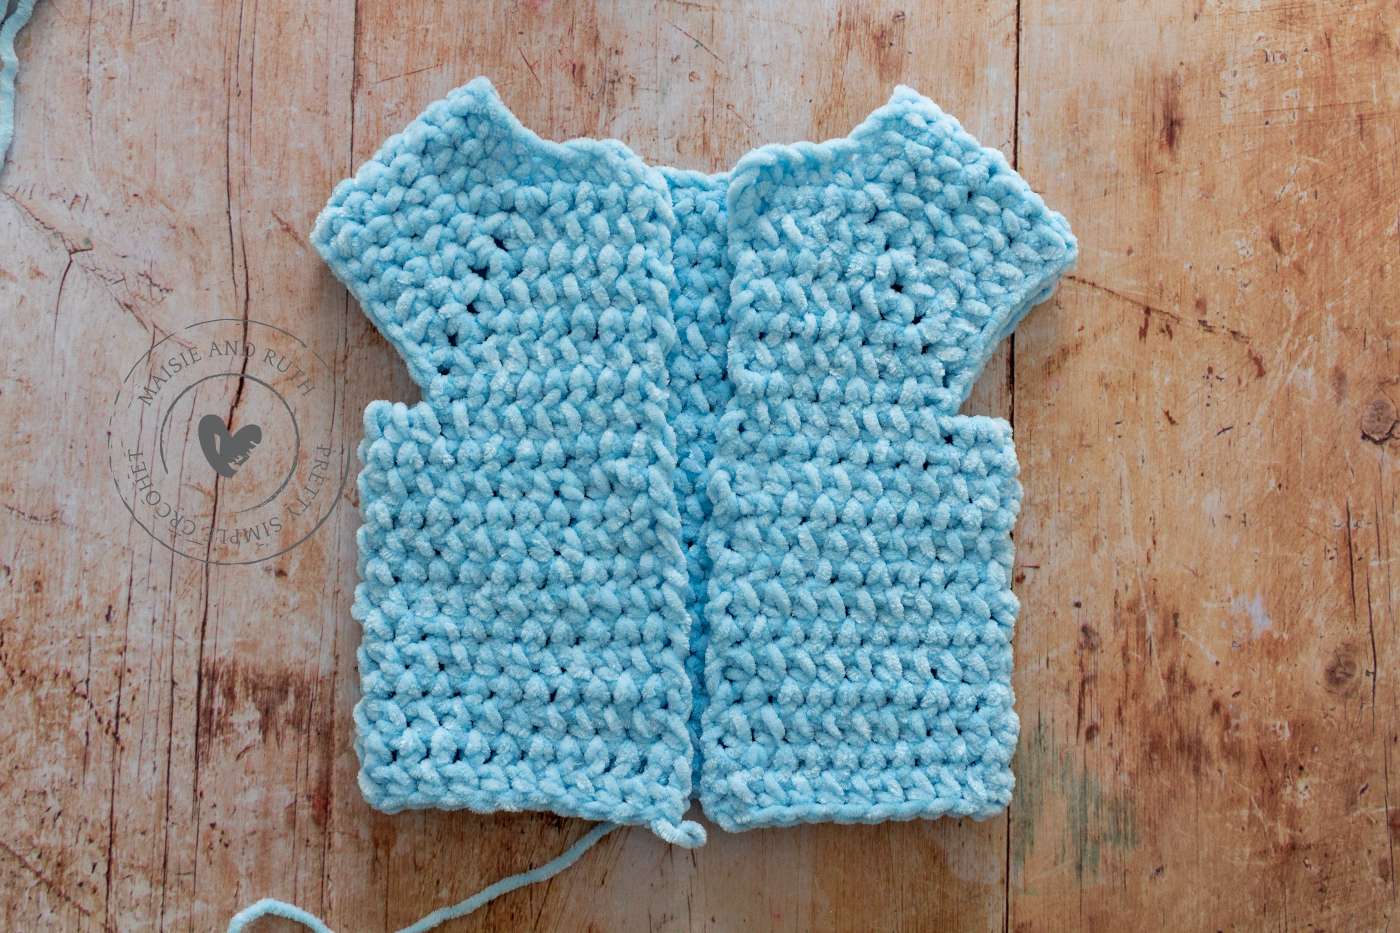
BODY
Change to a K (6.5mm) crochet hook.
Next Row . Ch2, 1hdc in first sp, 1hdc in next 6 ( 7 – 9 ) sps, 5hdc in next ch5 sp, 1hdc in next 18 ( 19 – 21 ) sps, 5hdc in next ch5 sp, 1hdc in next 7 ( 8 – 9 ) sps, 1hdc in sp between last st and beg ch2, TURN [ch2, 43 ( 46 – 51 ) hdc].
Next Row . Ch2, 1hdc in first sp, 1hdc in next 41 ( 44 – 49 ) sps, ending with 1hdc in sp between last st and beg ch2, TURN [ch2, 43 ( 46 – 51 ) hdc].
Repeat last row until you have 21 ( 23 – 24 ) rows in total from the neck edge.
Cut yarn, fasten off and weave in ends.
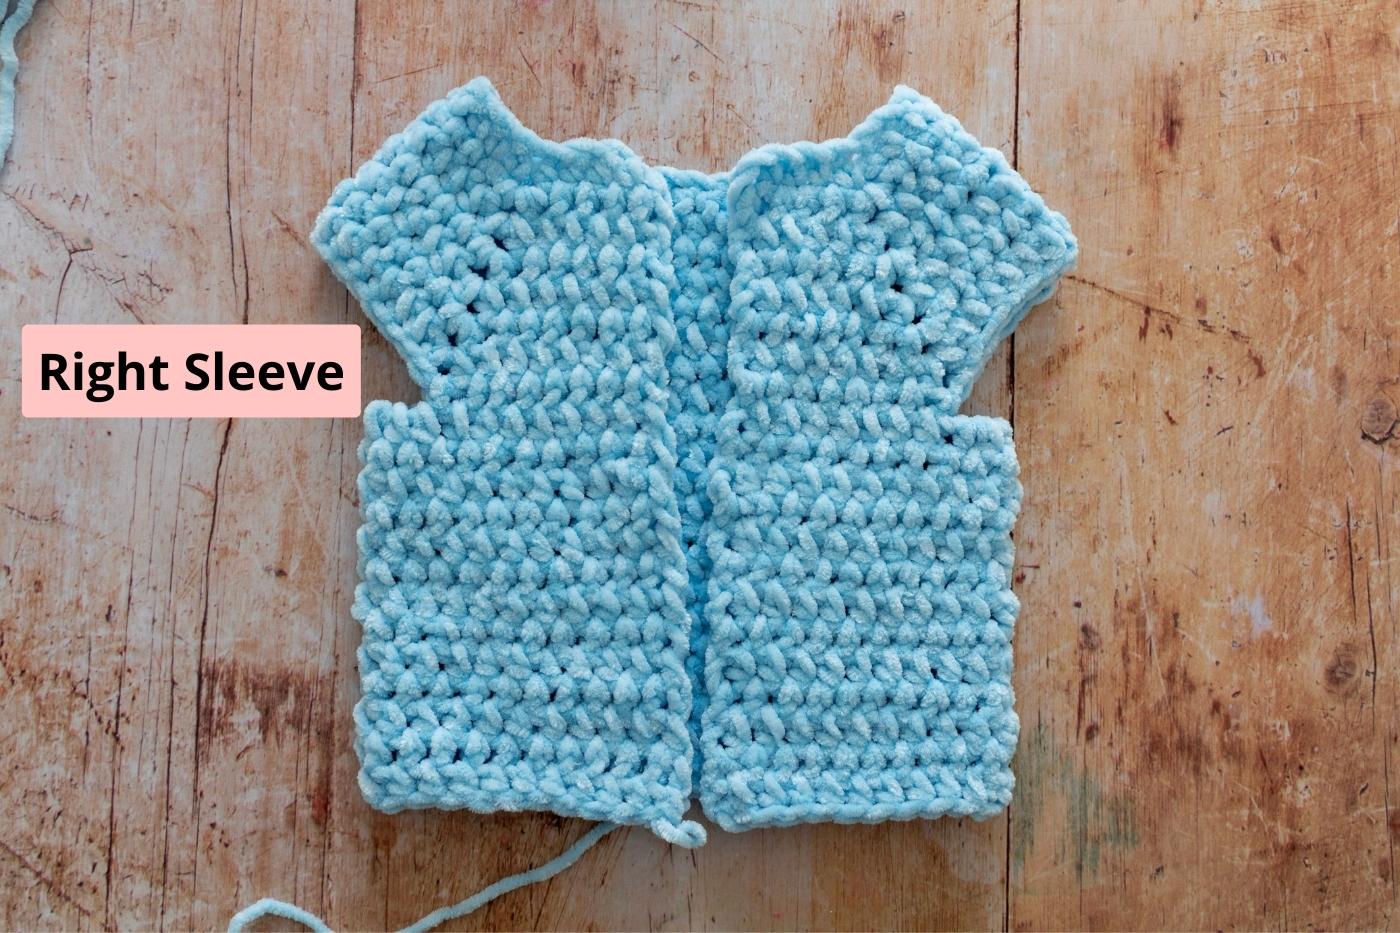
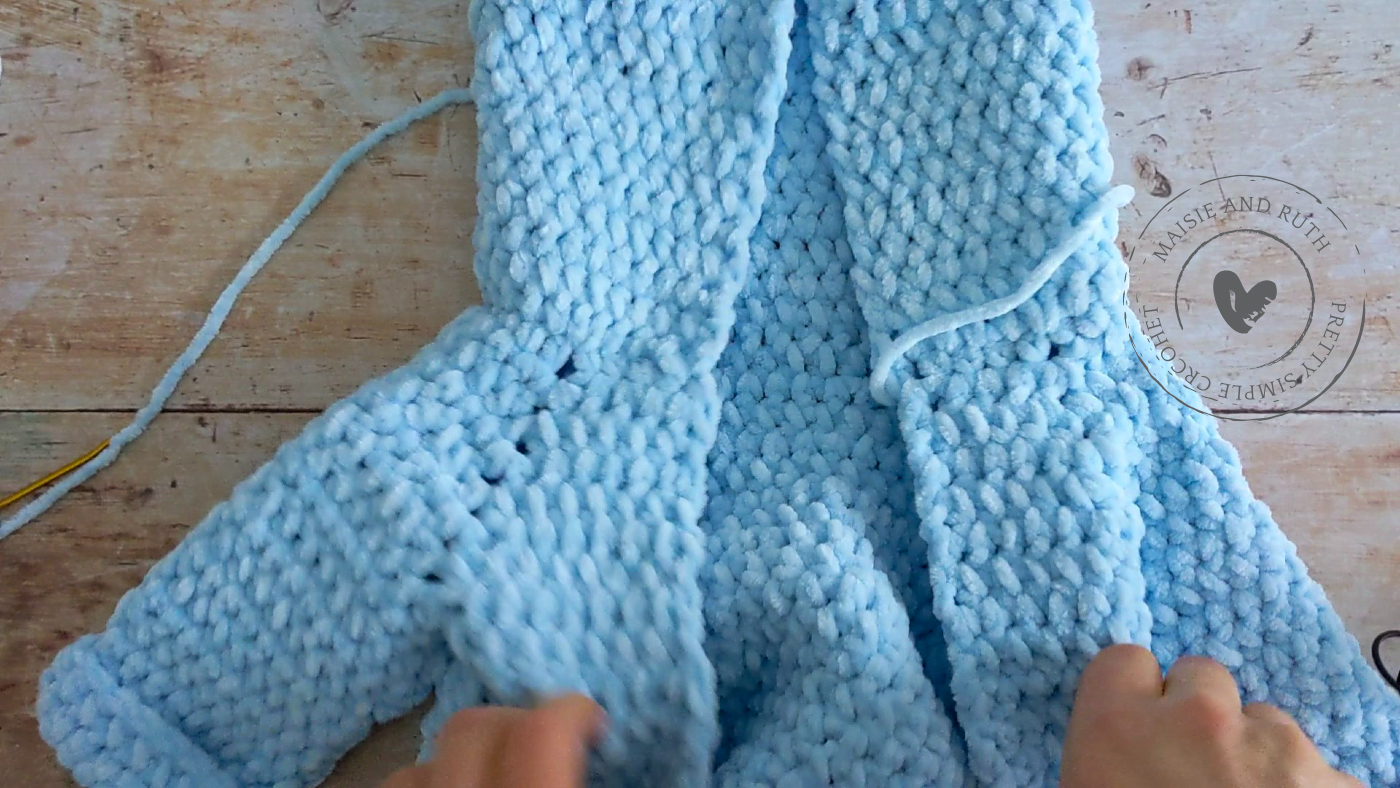
Here is what your work should look like at the end of row 21 ( 23 – 24 ) once you've completed the main body of your hoodie:
RIGHT SLEEVE
Change back to your J (6mm) crochet hook.
It's time to work on the sleeves now and you'll begin with the right sleeve first.
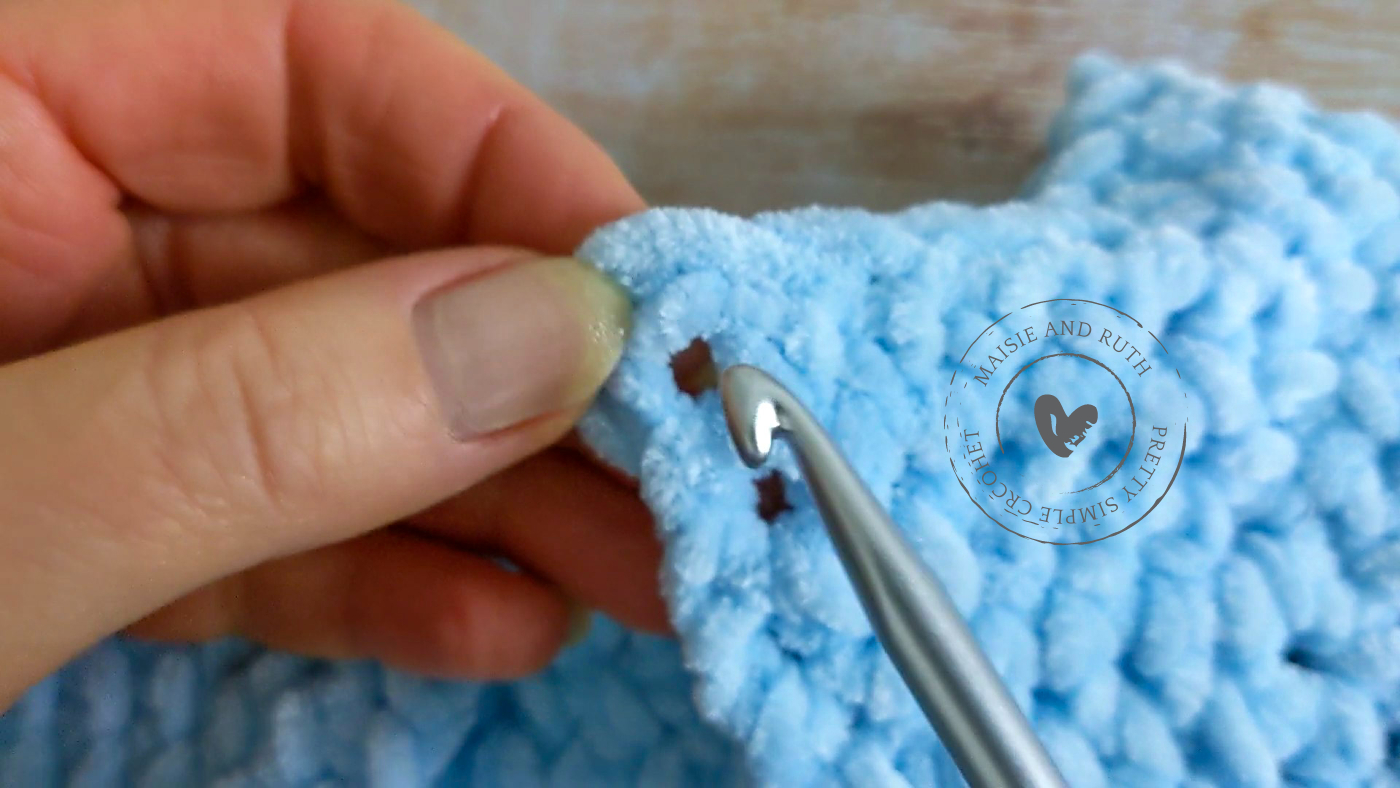
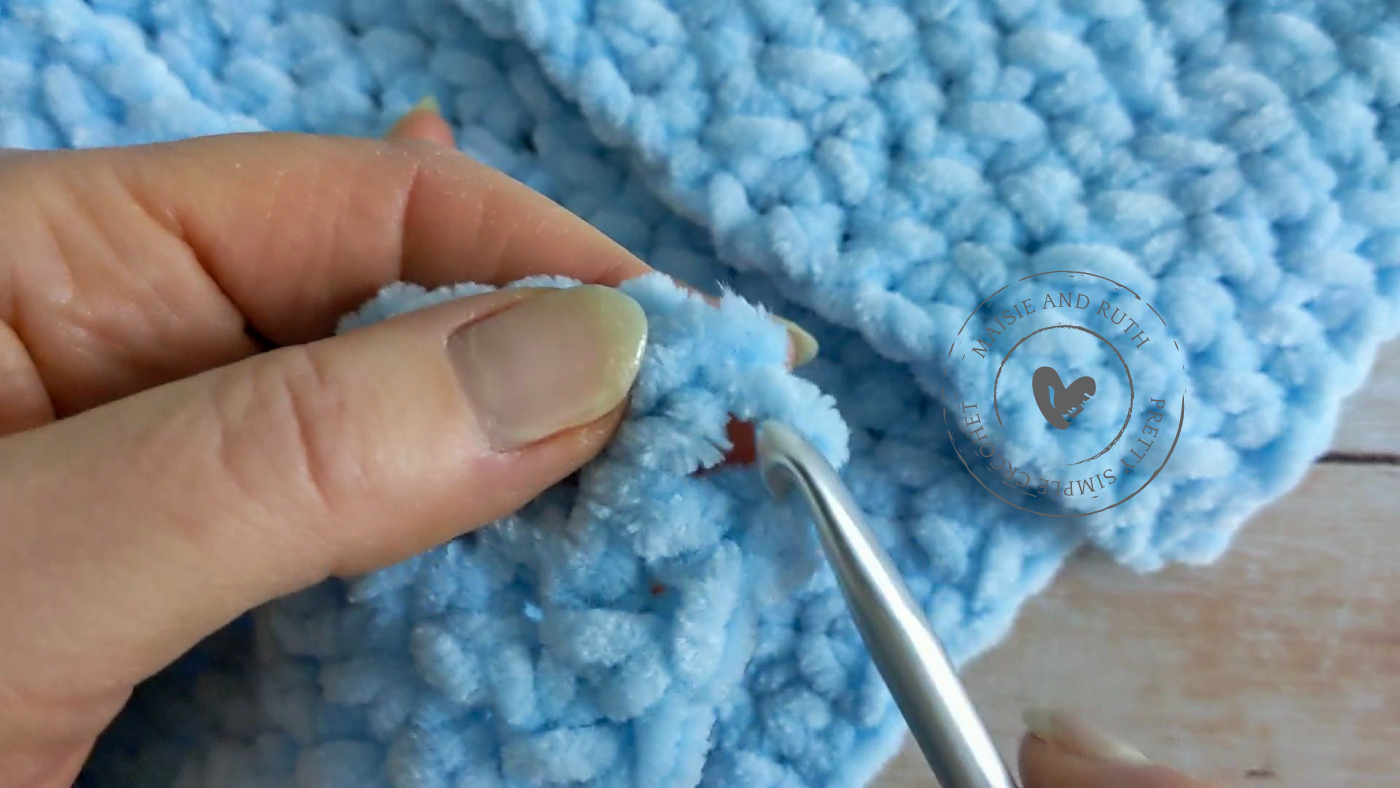
Come to the underarm section of your sleeve.
You'll remember that at the underarm section you worked 5hdc into the ch5 space.
Attach your yarn and start working in the space between the 4th and 5th stitch (as demonstrated by my hook in the photo below):
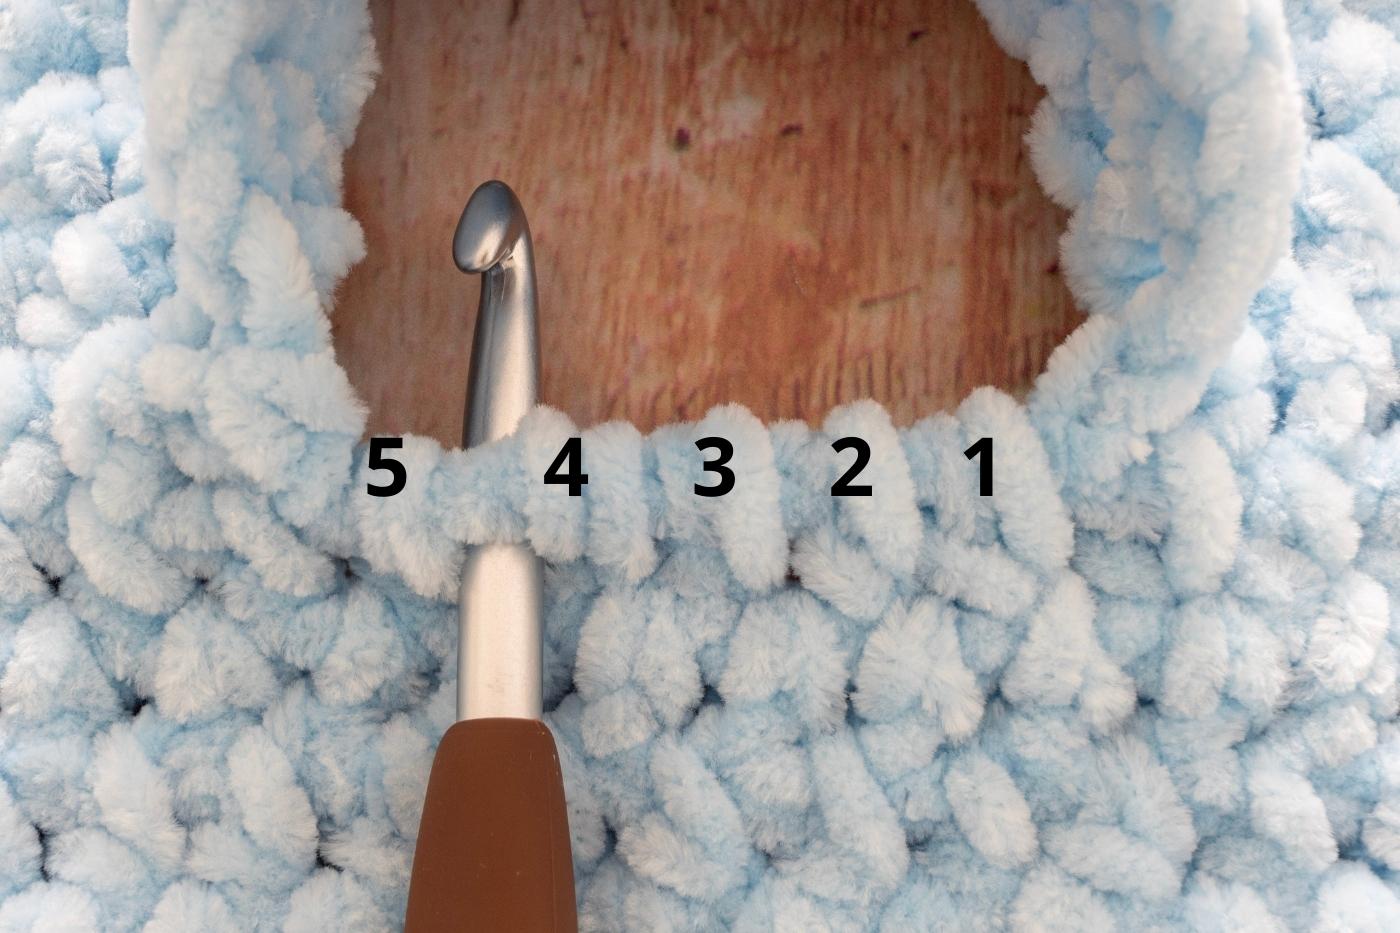
Round 1: Ch2, 1hdc in next 23 ( 24 – 26 ) sps around armhole, sl st in sp between beg ch2 and 1st hdc to join, TURN [ch2 & 23 ( 24 – 26 ) hdc].
Round 2: Ch2, hdc2tog over the first 2 sps, 1hdc in next 19 ( 20 – 22 ) sps, hdc2tog over last 2 sps, sl st in sp between beg ch2 and 1st hdc to join, TURN [ch2 & 21 ( 22 – 24 ) hdc].
Round 3: Ch2, hdc2tog over the first 2 sps, 1hdc in next 17 ( 18 – 20 ) sps, hdc2tog over last 2 sps, sl st in sp between beg ch2 and 1st hdc to join, TURN [ch2 & 19 ( 20 – 22 ) hdc].
Round 4: Ch2, hdc2tog over the first 2 sps, 1hdc in next 17 ( 18 – 20 ) sps, sl st in sp between beg ch2 and 1st hdc to join, TURN [ch2 & 18 ( 19 – 21 ) hdc].
Round 5: Ch2, 1hdc in first sp, 1hdc in next 17 ( 18 – 20 ) sps, sl st in sp between beg ch2 and 1st hdc to join, TURN [ch2 & 18 ( 19 – 21 ) hdc].
Rounds 6 – 16 ( 17 – 18 ): Repeat Round 5.
Cut yarn, fasten off and weave in ends.
Turn the sleeve up to create a little cuff.
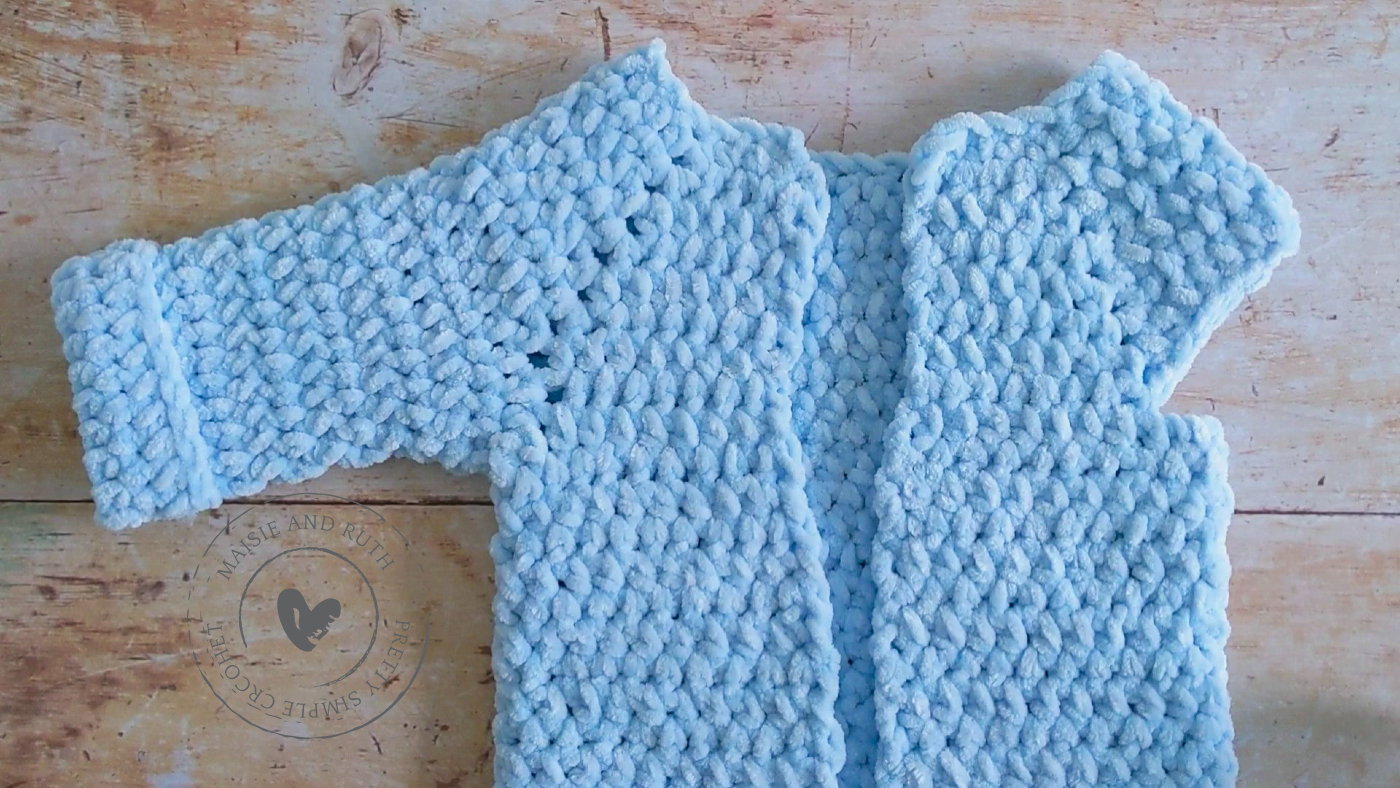
LEFT SLEEVE
Apart from where you'll re-attach your yarn, the left sleeve is worked in exactly the same way as the right sleeve.
Attach your yarn and start working in the space between the 4th and 5th stitch (as demonstrated by my hook in the photo below):
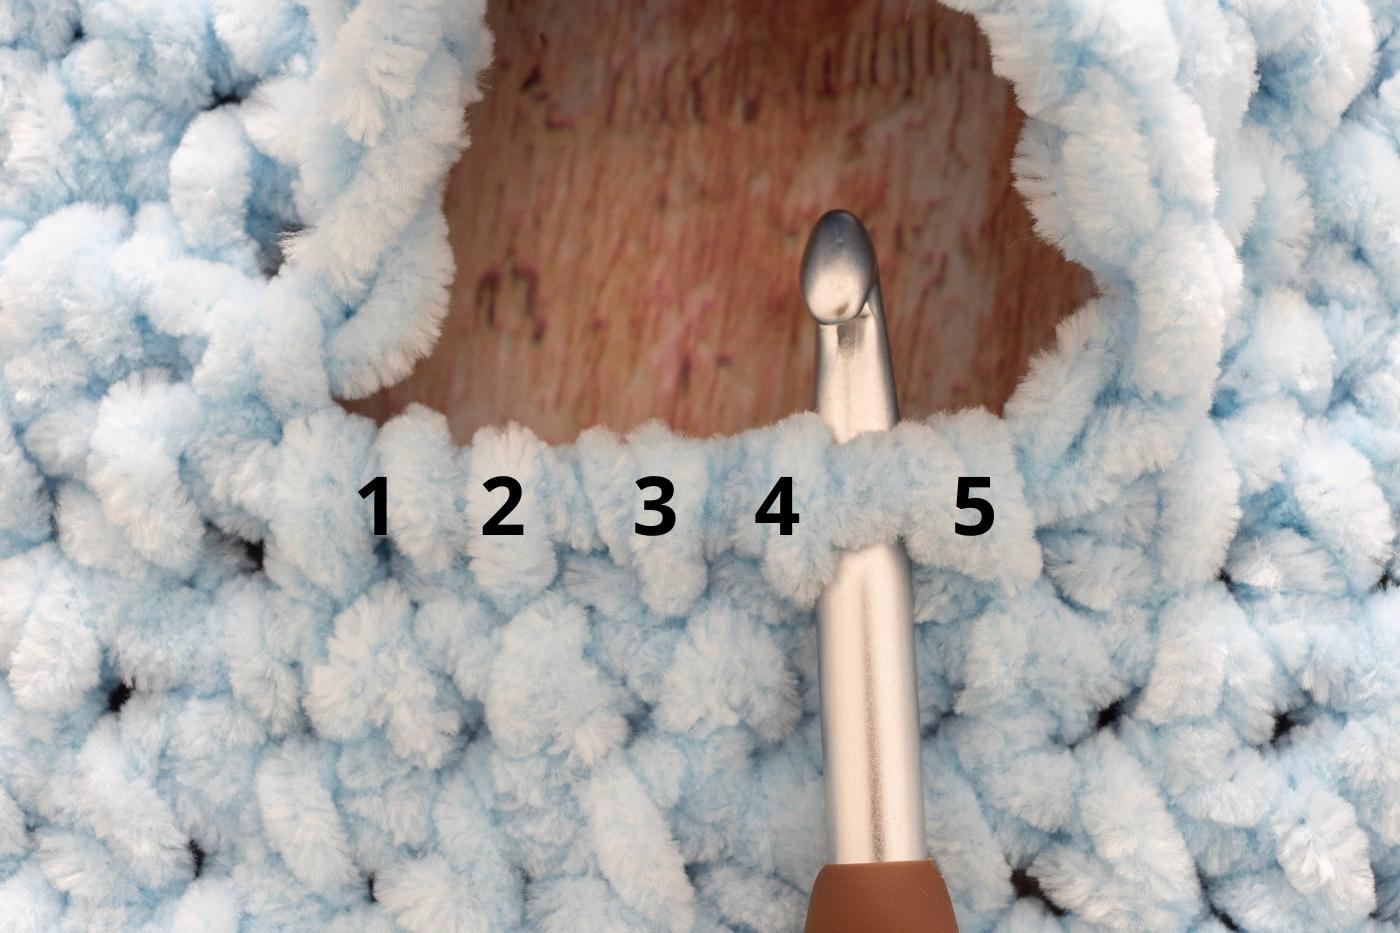
Work the left sleeve by following the instructions for the right sleeve above.
Both sleeves are now completed:
HOOD
Using your J (6mm) crochet hook:
With the right side of your work facing, come over to the left front of your hoodie:

Attach your yarn to the space in the top corner:
Row 1. Ch2 and turn your work, 1hdc in first sp, 1hdc in next 3 ( 4 – 5 ) sps, 2hdc in next ch2 sp, 1hdc in next 8 ( 9 – 10 ) sps, 2hdc in next ch2 sp, 1hdc in next 11 ( 12 – 13 ) sps, 2hdc in next ch2 sp, 1hdc in next 8 ( 9 – 10 ) sps, 2hdc in next ch2 sp, 1hdc in next 3 ( 4 – 5 ) sps, 1hdc in sp between last st and beg ch2, TURN [ch2, 43 ( 48 – 53 ) hdc].
Row 2. Ch2, 1hdc in first sp, 1hdc in next 41 ( 46 – 52 ) sps, 1hdc in sp between last st and beg ch2, TURN [ch2, 43 ( 48 – 53 ) hdc].
Rows 3 – 17 ( 18 – 19 ) : Repeat row 2.
Cut yarn, leaving a long tail for sewing.
SEWING THE HOOD
You'll sew the hood together with the right side facing out:
Bring the two sides of the top of the hood together:
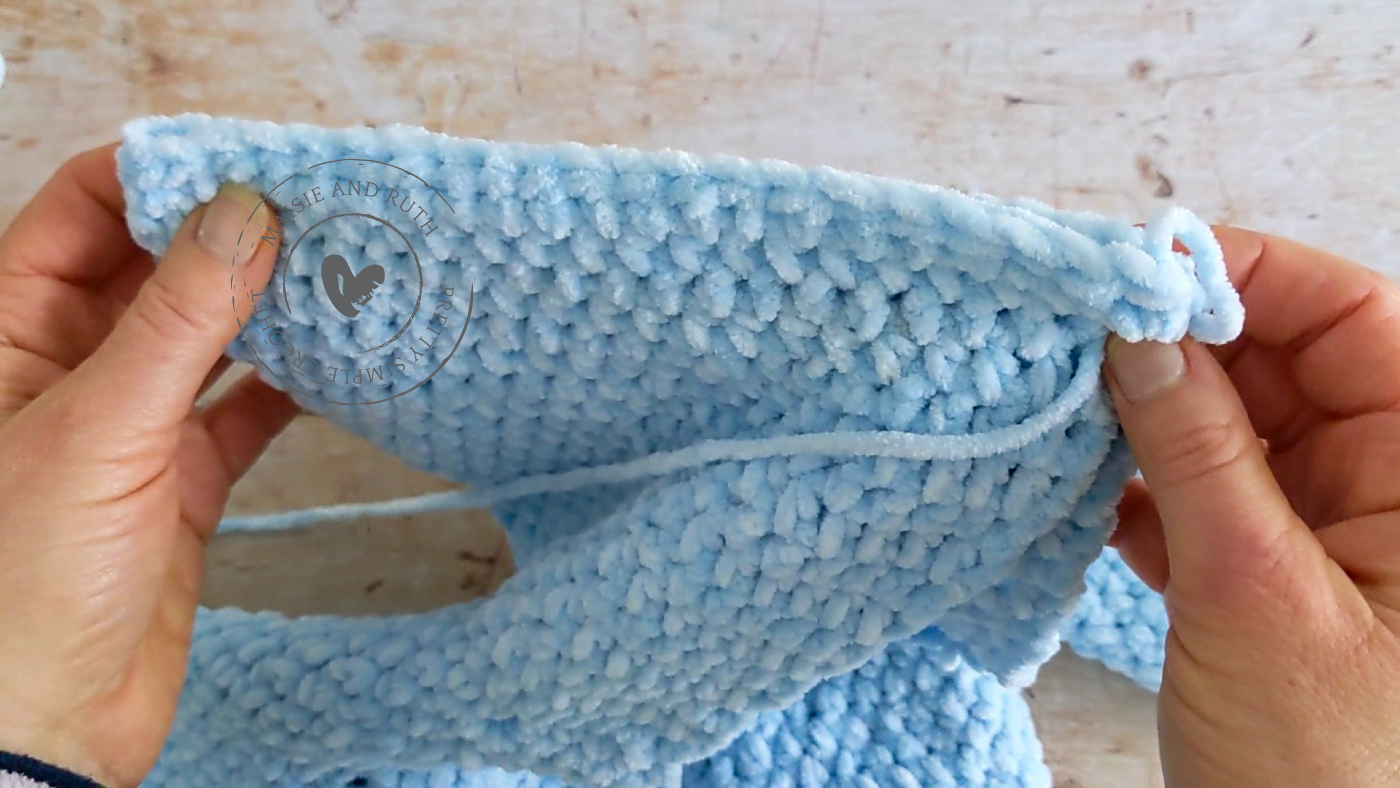
With your needle, whip stitch the two sides together (insert your needle through the front loops on the side nearest to you; go through the back loops on the opposite side of the hood).
Remember: I show you how to seam the hood together in the video tutorial below.
Once you've finished sewing the hood, bring your yarn to the inside of your work and weave the tail in.
Fold the hood over to create a little brim:
EDGING
Use your J (6mm) crochet hook.
The edging is made in two continuous rounds.
With the right side of your work facing, start with the right front and attach your yarn to the corner space at the bottom:
Round 1. Ch1, 1hdc in first sp, 1hdc in next 20 ( 22 – 23 ) sps up right front, 1hdc in next 35 ( 37 – 39 ) sps around hood, 1hdc in next 21 ( 23 – 24 ) sps down left front, TURN [ 77 ( 83 – 87 ) hdc].
Round 2. Ch1, 1hdc in first sp, 1hdc in next 60 ( 62 – 66 ) sps, ch2, 1hdc in next sp (button hole made), 1hdc in next 14 ( 18 – 18 ) sps, 1hdc in sp between last st and beg ch1 [ 77 ( 83 – 87 ) hdc].
Cut yarn, fasten off and weave in ends.
Sew your button on the left front of the cardigan, making sure that it's aligned with the button hole on the right front.
EARS (MAKE 2):
Using your J (6mm) crochet hook:
Chain 4 and slip stitch to 1st chain to form a ring.
Round 1. Ch1 (does not count as your 1st st here and throughout), 8 ( 8 – 9 ) sc in centre of ring, sl st to 1st sc to join [ 8 ( 8 – 9 ) sc].
Round 2. Ch1, 2sc in same st (at base of ch1), 2sc in next 7 ( 7 – 8 ) sts, sl st to 1st sc to join [ 16 ( 16 – 18 ) sc].
Rounds 3 – 4: Ch1, 1sc in same st (at base of ch1), 1sc in next 15 ( 15 – 17 ) sts, sl st to 1st sc to join [ 16 ( 16 – 18 ) sc].
Cut yarn, leaving a long tail for sewing on to hood.
Position your ears on the hood, just above the rolled up brim (or wherever you think looks best).
I like to pin the ears in place to make sewing them on to the hood easier.
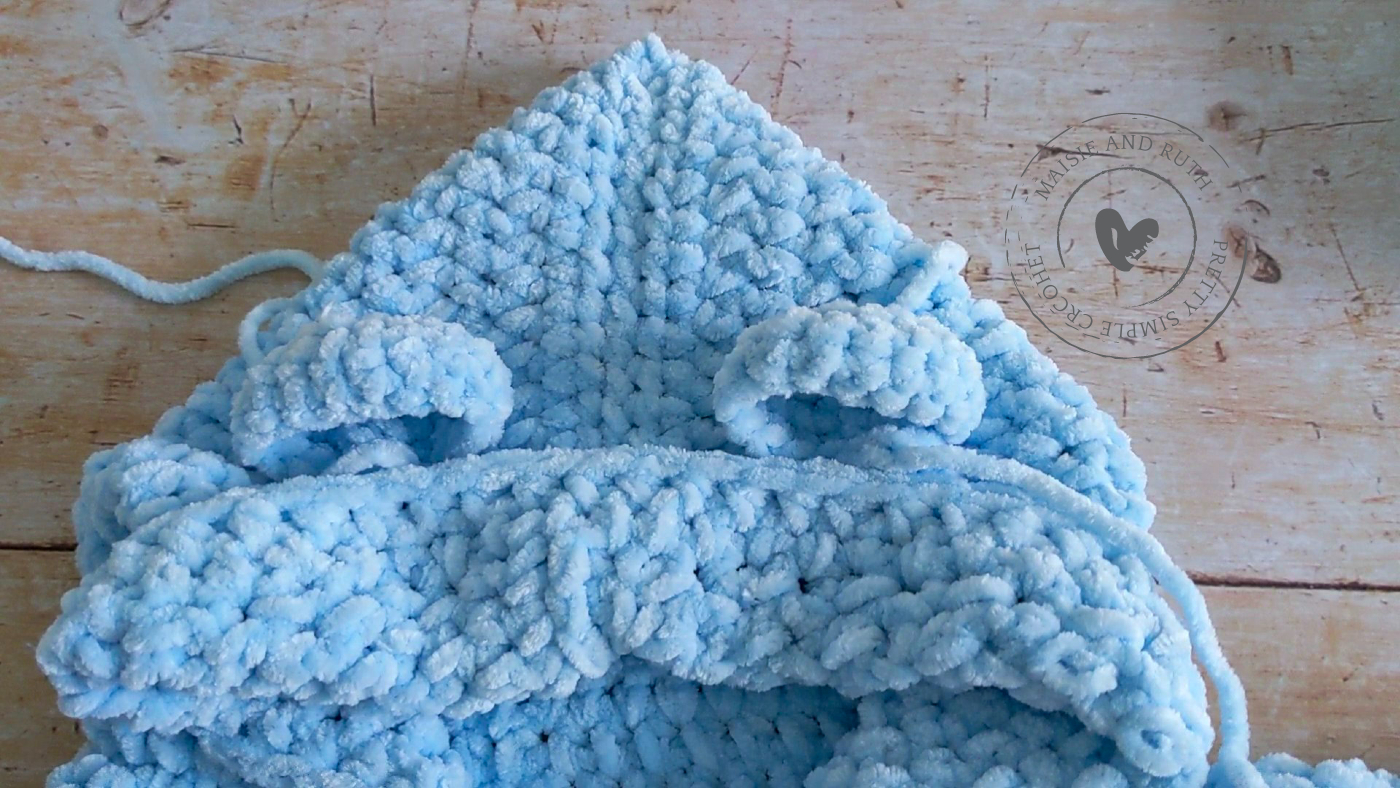
And that's your super cute crochet baby hoodie all finished!
I really hope that you enjoyed this crochet baby hoodie pattern.
I would love to see photos of your work… please tag me on Instagram using @maisieandruth
And remember to pin this pattern for later if you can't make it right now!
Happy crocheting,

Source: https://maisieandruth.com/crochet-baby-hoodie-with-ears-free-pattern/
0 Response to "Free Quick and Easy Crochet Hooded Baby Sweater Pattern"
Post a Comment